Hello, I’m Ryan Gadea or TKOWL as I go on here, and I recently finished in the top 16 at the Winter Regionals in Virginia. This is the first time I’ve ever top cut an event, and although I do have some regrets about not making farther, I’m still incredibly happy I made it that far at such a tight regional.
Generation 5 is when I started playing competitive Pokemon, and I ended up stealing teams more of the time or just not being that original, but then trying to put on weird spins that are okay, but nothing really that recommendable. This is what I’ve liked a lot about Generation 6 so far: ever since the games first launched, I've had an easier time seeing what works, try out a ton of cool new things, learn about what threats I have to counter. Compared to VGC 2011 and the dawn of the Gen 5 meta, this new restricted meta has started to develop much quicker and seeing a wider variety of Pokemon, moves, and items being used. I also love how much easier it is to obtain the right IV’d Pokemon in-game, and it’s forced me to think a lot more about my Pokemon team choices before I breed for them.
My team changed a ton of times during testing: from starting out as a rain team, to a standard Kangaskhan/Klefki/Talonflame/Meowstic/etc team, to what it is now. It became more developed the more of what I saw being used, but I wanted to make sure that I was fully confident in what I was using, so it was finalized sometime even before the new year. Me and Cameron (Stormfront) also shot each other ideas often, and he was a part in making the team what it is.
Mienshao @ Focus Sash
Ability: Inner Focus
EVs: 4 HP / 252 Atk / 252 Spe
Jolly Nature (-SpA,+Spe)
-Fake Out
-Low Sweep
-Rock Slide
-Quick Guard
Used 10/11 matches
Mienshao has always been a Pokemon I’ve turned down before because it’s “too frail” or “too slow”, but in this meta, after having been annoyed at how when testing Scrafty that its Quick Guard just wouldn’t cut it against protecting my team against Kangaskhan and Meowstic Fake Outs, I checked the list of other, faster Pokemon that can learn Quick Guard. Mienshao sprung to my attention because of its 105 speed, which in this meta where base 100 is the standard of speed to beat, that’s very good. Mienshao is also interesting in that it can’t be flinched itself with Inner Focus, so it provides extreme Fake Out pressure onto the opponent. And that’s where Quick Guard comes in: with it, I can guarantee that the partner can get away with whatever it wants to, and leave threats like Kangaskhan and Talonflame sitting ducks for the turn. Rock Slide was there so that I get off some fast spread damage, and surprise Mega Charizard Y by outspeeding and OHKOing it. Low Sweep is an interesting move for this meta: with Icy Wind nowhere to be seen, clutching speed ties or guaranteeing the ability to outspeed is only really doable with Tailwind (which I personally dislike using because of how short it lasts). The move still has solid 65 BP+STAB, which was enough to OHKO Ttar and get 50% off on Kangaskhan, while putting some solid neutral damage on Rotom. Mienshao’s biggest weakness is still its miserable bulk, but that ended up being more of a plus for my team: when pairing up Mienshao and Aromatisse, I want Abomasnow to have a safe switch-in to the battlefield so that it can start KOing in Trick Room, so having Mienshao faint would provide that. Mienshao isn’t really a Pokemon everyone should rush to using, but if you need a fast supporter that still provides offensive pressure, give Mienshao a second look.

Aromatisse @ Safety Goggles
Ability: Aroma Veil
EVs: 252 HP / 96 Def / 24 SpA / 136 SpD
Sassy Nature (+SpD,-Spe)
IVs: 0 Spe
-Reflect
-Light Screen
-Moonblast
-Trick Room
Used 5/11 matches
This slot originally belonged to Assault Vest Slowking, but I found more as time went on that it was plain annoying how much Tyranitar started to have the edge on my team with it (and because Aromatisse is 10x more adorable). This Aromatisse was actually donated to me by Cassie for shiny value trading a few months ago, but when I was replacing Slowking to put in a new TR setup, its potential shined: not only did Aromatisse have a better offensive and defensive typing in Fairy, but it had a whole slew of supporting moves that I needed Abomasnow to have. Abomasnow and Aromatisse are incredibly fun to use together, as Aromatisse sets up the Trick Room for Abomasnow to flourish in, and setting up the screens that will allow it to clutch attacks. Safety Goggles also compliments Abomasnow well: she won’t be taking excess hail damage, and can ignore Amoonguss completely, which is a big pain for Trick Room Pokemon. During Battle Spot testing, I’ve hilariously had matches where Amoonguss will try to Rage Powder away a Moonblast from its partner, only to have Aromatisse hit through it anyways. The EVs are something I could’ve worked on a little bit more: it allows it to take 60% from Scizor’s Bullet Punch and lives Mega Gengar’s Sludge Bomb, but I have the dual screens to not only help myself, but my allies. Unfortunately, I didn’t run into a single Amoonguss all tournament (I have to stop overhyping these mushroom Pokemon), so in hindsight, Light Clay would’ve been a better held item.


Abomasnow @ Abomasite
Ability: Snow Warning
EVS: 112 HP / 144 Atk / 252 SpA
Quiet Nature (+SpA, -Spe)
IVs: 0 Spe
-Blizzard
-Energy Ball
-Ice Shard
-Protect
Used 7/11 matches
Before Generation 6, I had relatively no interest in running Abomasnow despite seeing its success, it just always seemed to lack the kinda firepower I’m comfortable with. With the introduction of Mega Evolutions, Abomasnow was one of those Pokemon I really wanted to see obtain one for that reasons, which it was thankfully granted. After seeing how much of a technical counter it could be in testing, I decided to run it full-force on my team. Abomasnow helped shape a lot of what my team became, and he was incredibly fun to use. The lowered speed of Mega Abomasnow makes it incredibly scary in Trick Room, as perfectly accurate 132 base Specail Attacks Blizzards pack quite a punch (and possibly a freeze). Energy Ball is there for good neutral secondary STAB, as I dislike the recoil from Wood Hammer, and Gigia Drain isn’t legal for this format (even if it was, the Energy Ball BP buff makes it perfectly viable to use on its own). Ice Shard was there to catch the KOs on Pokemon that were weakened from Blizzard, and just provide in general good priority. What’s great is that opponents will freely Swagger on Abomasnow, but if I’m able to hit through or snap out of confusion, Ice Shard just becomes even more painful. Mega Evolving also allows me to reset an opponent’s Sand, Rain, or Sun whenever I want to, definitely helping out my team. Abomasnow and Aromatisse formed more of my team’s fast mode, as the two compliment each other incredibly well. The EVs are mostly offensive-based: maxed out Special Attack for the hardest-hitting Blizzards and Energy Balls, and ??? Attack so that I can OHKO Garchomp after a turn of hail damage. Abomasnow has a lot of problems against a lot of common Pokemon such as Charizard-Y and Talonflame, but against other meta Pokemon like Hydreigon, Garchomp, Rotom-W, Politoed, Tyranitar, Amoonguss, Dragonite, etc., it’s a fantastic counter.
Thanks a bunch to Uncle Taint for providing me with this Abomasnow before regionals.
Garchomp @ Lum Berry
Ability: Rough Skin
EVS: 4 HP / 252 Atk / 252 Spe
Jolly Nature (-SpA, +Spe)
-Dragon Claw
-Earthquake
-Rock Slide
-Protect
Used 6/11 matches
Garchomp is probably one of my favorite Pokemon to use: this is the third Regional I’ve used him. In Generation 5, it kinda saddened me to see Garchomp lose out its usage thanks to Landorus-T being so much better, but with that tiger genie out of the picture, Garchomp rose up again. Generation 6 has also in my opinion made Garchomp a more balanced Pokemon; with the rise of physical attackers like Kangaskhan and Mawile, it’s very nice to have Rough Skin inflicting that small but possibly crucial chip damage. Garchomp also clutches against that previously mentioned 100 base speed standard, with two points above that. Its typing is also fantastic, and even with the rise of Fairy-types, it still holds strong with some great resistances and defenses. Garchomp also became a great defense against Sun teams, a fact that I wanted to emphasize even more with Lum Berry. I originally ran Life Orb, but more and more in testing I would either be massive status bait or just end up killing myself in recoil. I gave up the offensive prowess in order for better defense against Will-o-Wisp Rotom-W or Venusaur/Amoonguss spamming their sleeping moves. Other than that, this is a pretty bread-and-butter Garchomp EV spread and moveset, but it works well and is reliable enough that I wouldn’t have it any other way.

Rotom-Heat @ Sitrus Berry
Ability: Levitate
EVS: 220 HP / 60 Def / 124 SpA / 96 SpD / 8 Spe
Modest Nature (-Atk, +SpA)
-Overheat
-Thunderbolt
-Will-o-Wisp
-Protect
Used 7/11 matches
Rotom is a Pokemon I’m not completely fond of using, but with how good it is in this meta, I can’t turn it down. It was originally a Rotom-C (which I ditched after a week because it still couldn’t OHKO Rotom-W and that it made my team even more Talonflame weak), and then a Rotom-W, but then Mega Manectric began giving my team problems. Looking at the formes again, I realized just how damn much resistances and proper coverage Rotom-H had, so I swapped to it. Rotom-H became good pressure even before doing anything, immediately threatening out Scizor, Mawile, Gyarados, etc. Both Garchomp and Rotom-H form an extremely strong lead combo (or just a combo in general), as they both pack a punch and Rotom-H avoid Garchomp’s Earthquake. Like Garchomp, Rotom-H’s moveset is as standard as you can get, but even when trying to use other options like Light Screen or Thunder Wave, I just ended up going right back the basic one. The EVs are a little bit odd, as I had a hard time choosing whether I wanted Rotom to go offensive or go defensive, so it ended up being a somewhat even split. The 8 speed EVs are there so that it can outrun 4 speed Rotom, which I saw a lot of in practice.
Clawitzer @ Assault Vest
Ability: Mega Launcher
EVS: 252 HP / 4 Def / 252 SpA
Modest Nature (-Atk, +SpA)
-Water Pulse
-Dark Pulse
-Aura Sphere
-Dragon Pulse
Used 9/11 matches
I had a pretty major case of “Can’t decide what mon to use for my last slot” syndrome, as I cycled through a TON of viable Pokemon, from Scizor to Gyarados to Mawile to Aegislash to Gengar, but every one I tried just made my team that much more weak to stuff like Talonflame, Rotom-W, Kangaskhan, Charizard, etc. However, after seeing Zog’s report and how he used Assault Vest Clawitzer to good effect, I decided to give it a go. Not only did it provide even more offensive pressure to my team and deal solid damage to a ton of variety of Pokemon, but it had rather impressive special bulk, being able to take a 3HKO from Rotom’s Thunderbolt. I think no real other Pokemon I would’ve been that comfortable using for this slot: although I have no Steel or Poison coverage, Clawitzer provides just enough coverage and offensive pressure that I’m fine with it.
Thanks a lot to BlitznBurst for providing me with a spitback parent because I don’t have access to Clauncher in Y.
Combos
Rotom-H+Garchomp
This combo puts a lot of pressure onto common leads such as Talonflame, Kangaskhan, Charizard, Venusaur, as Garchomp is free to spam Earthquake. If I find myself having trouble setting up Trick Room, I would often go to these two for my lead, and have Mienshao/Clawitzer in the back.
Mienshao+Rotom-H
Rotom-H is pretty large Fake Out/Status bait, so Mienshao is there to make sure that it can get up its Will-o-Wisp/attacking move on the opponent. Mienshao also helps and stops threats like Tyranitar and Gyarados that give Rotom-H trouble, and using Low Sweep to assure that I can outspeed and clutch the final hit on Rotom-W and Gyarados.
Mienshao+Garchomp
A similar combo to the previous one, expect one that moves at a faster speed tier. Mienshao helps tremendously against opposing Garchomp and Salamence by slowing them down, allowing Garchomp to pick up the Dragon Claw KO next turn. Low Sweep is also tremendously helpful in dealing with Greninja and fast Talonflame, allowing Garchomp to KO them. Both also have Rock Slide, which not only deals incredibly solid spread damage, but has an increased ratio of flinching the opponent.
Mienshao+Aromatisse
When I wanted to go into fast mode, this is what I would usually lead with. Mienshao makes sure that Aromatisse is able to get up its Trick Room and/or its screens, but with this combo, Mienshao more than likely is in a sacrificial role, so that I can bring in Abomasnow safely.
Abomasnow+Aromatisse (AromaSnow)
This was my favorite combo to use. With Trick Room, Safety Goggles and dual screens from Aromatisse plus a sold STAB in Moonblast, plus hail, low base speed, and hard-hitting STABs from Mega Abomasnow, the two just compliment each other so much. The two do both share unfortunate Poison and Steel weakness, but that’s what the rest of the team is there to deal with, allowing these two to provide incredible pressure onto the opponent.
Clawitzer+Rotom-H
Two solid special attackers that cover each other’s bases very well. Clawitzer puts pressure against opposing Tyranitar, Mamoswine, Meowstic, Salamence, Hydreigon, etc., while Rotom-H deals with Amoonguss, Gyarados, and other physical attackers.
Saturday, January 11
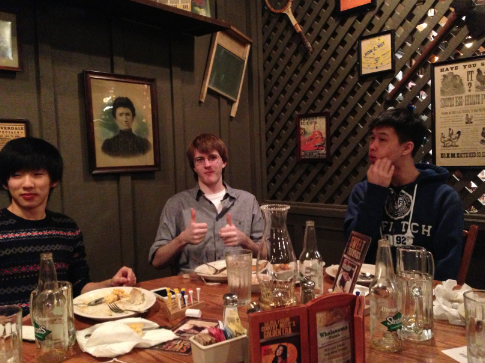
After a brutal 6-hour ride in the rain and traffic from Philly to Doswell (I thank my mom a lot for taking me there), I arrived at the convention center. Though a lot of people complained how the event was in the middle of nowhere, I kinda liked the quietness of the area, and how the air was actually clean. I immediately met honchkro13 and FonicFrog, and we hung out at the convention center for a few hours, before we headed back to bearsfan092’s hotel room, and watched some competitive Melee, which is still a marvel and overwhelming to observe. Bears then later drove a bunch of us down to the Cracker Barrel, where Ray was talking about the kinda stupid stuff he knew people were brining to Regs tomorrow while everyone indulged on the gravy train.

After that we went down to Team Aqua vs. Team Flare Laser Tag which was incredibly fun, abiet kinda stupid that you had to have two hands on the gun at all times. After all of that I was exhausted and headed back to the hotel for about 7 hours of sleep.
Sunday, January 12
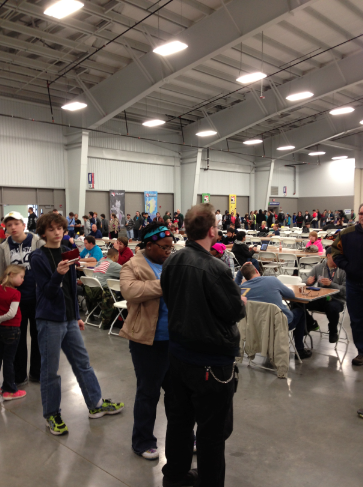
This is seriously giving me some horrible Newark 2011 line flashbacks...
After signing up in the morning (with a rather dismal hack check), I met a few more people from the forums, but then my stomach started to have this really harsh pain. It was horrible for almost an hour, and I was thinking I would have to drop out. Even at the player's meeting table, the announcement of a Top 16 cut and 9 swiss rounds didn't get me all that excited because I was so uncomfortable. But, realizing I'd gone this far south, it would be a waste to just stop right here, so I forced my body to forget the pain and endure the day. As the day passed on, I began to feel a lot better, so I don't know if it was just adrenaline or that pain was all just anxiety.
Me: Mienshao/Aromatisse/Abomasnow/Clawitzer
Opponent: 


 (Mamoswine/Rotom-C)
Still recovering from that stomach pain, I came hyped into the first round. From team preview it looked almost like the kind of team I made in the first month of the metagame, instead with less Klefki and Trevenant and more Mamoswine and Rotom-C. Knowing that Abomasnow would do a ton of work against this team, I decided to lead out with Mienshao/Aromatisse, and he went with Kangaskhan/Talonflame. I Quick Guarded as both his Fake Out and Brave Bird were blocked as Aromatisse set up Trick Room. I remember getting rid of Talonflame with Rock Slide (he was running a faster Talonflame as I was able to underspeed it in TR), as he switched out Kangashkan with Politoed, and meanwhile Aromatisse set up Reflect. From there I switched out Abomasnow to get rid of the rain, as he ended up making a few more switches on the oncoming turns, trying to get back his rain but Mega Abomasnow wasn't having any of that, while Aromatisse set up Light Screen and provided the damage enough for Abomasnow to KO everything left with Blizzard/Energy Ball, pulling a 4-0 victory. Pdonz admitted that he hadn't really trained with his team all that much, but I do commend him for still using rain, especially at how nerfed it has become this gen.
1-0
Round 2- Ben
Me: Mienshao/Rotom-H/Garchomp/Clawitzer
Opponent: 


 (Pinsir/Tyranitar)
From team preview the Pinsir scared me a lot, because I didn't really know what moves it would be running in Mega; however, he didn't even bring it. He led out with Lucario and Leafeon, as I led with Mienshao/Rotom-H, which could threaten out Tyranitar, Pinsir, Lucario, and Leafeon. I protected with Rotom-H, as Lucario Quick Guarded and Leafeon immediately went for Baby-Doll Eyes on Mienshao, which caught me off guard a little bit, as Mienshao Low Sweeped the Lucario, insuring that even if he Mega Evolved, he would still be undersped. Next turn Lucario mega evolved, as Leafeon went for Helping Hand, which scared me as I thought priority would be incoming, but it didn't, as Mienshao KO'd Lucario and Rotom-H KO'd Leafeon. As Greninja and Chandelure came in, I was scared Chandelure would be scarfed, but it turned out it was a slower, Will-o-Wisp variant, as it burned Mienshao after I got another Low Sweep onto Greninja, as I protected with Rotom-H. The rest of the match was a bit of a blur to me, but I was able to bring in Garchomp safely and then KO Greninja and Chandelure, ensuring another 4-o victory.
2-0
Round 3: Tanner
Me: Mienshao/Aromatisse/Abomasnow/Clawitzer
Opponent:  (Garchomp/Salamence)
This match I just did not play that well in at all. Seeing Garchomp, Salamence, and Greninja on the field, I thought Abomasnow would have a definite advantage, so I went into the same autopilot mode that's worked for me before. However, his Greninja got a burn off every single time it used Scald, which turned a 3HKO on Aromatisse into a 2HKO after burn damage, and he played his Meowstic cleverly, setting up Safeguard and then using Swagger on his own Kangaskhan a few turns later. He won 2-0 against me, as I learned that I needed to get off of autopilot mode and start getting even more serious.
2-1
Round 4: Lucas
Me: Rotom-H/Garchomp/Mienshao/Abomasnow
Opponent: 


 (Rotom-W/Tyranitar)
This is the kind of team I've seen being used a lot on Battle Spot, and I immediately know he's going to want to lead out with Charizard/Venusaur, so I go with the safe Rotom-H/Garchomp lead. He mega evolves and Protects with Charizard as I protect with Rotom-H, as he Sleep Powders into the Protect as I go for the safe Rock Slide. Next turn he goes for Sleep Powder onto Garchomp but misses (it wouldn't have mattered anyways thanks to Lum), as Garchomp KOs Charizard and Rotom-H Overheat KOs Venusaur. The following turns I'm able to switch out Garchomp and burn his Scarf Mamoswine, and able to safely KO both it and Scizor, I think finishing at 3-0.
3-1
Me: Rotom-H/Garchomp/Clawitzer/Mienshao
Opponent:  (Rotom-W/Amoonguss)
I don't remember exactly what happens the first two turns, but I do remember he switched out Scizor for Tyranitar, and then went for Sucker Punch+Ice Fang on Garchomp the turn after switching, as Rotom knocks out Talonflame. When switching in Clawitzer for the fainted Garchomp, he's forced to switch out Tyranitar for Scizor because of Scarf, as I go for the safer play and Aura Sphere it, as I should've just used Water Pulse. He then switches out Scizor again for Tyranitar as I go for the Water Pulse, playing safe again, but Tyranitar lives by less than 10%. I think Kangaskhan had been burned during this time, and went for a Sucker Punch+Scarf Rock Slide from Tyranitar, but Rotom is thankfully able to live at 3 HP from 99 HP, but it gets flinched, as Clawitzer knocks out Kangaskhan. Clawitzer gets knocked out by hail damage, as I send in Mienshao, and I protect Rotom and go for Rock Slide after he goes for Rock Slide again (thankfully, Inner Focus saves me from a possibly nasty flinch), KOing Tyranitar and leaving me with my Rotom and Mienshao versus is Scizor, pretty much assuring me victory as Bullet Punch fails to knock out Rotom.
4-1
Me: Garchomp/Rotom-H/Mienshao/Clawitzer
Opponent:  (Mawile/Rotom-W)
I see Mawile in team preview, which is one Pokemon my team can have massive trouble against, so I prepared against it accordingly, bringing the same set as last match. This is another match where I can't really remember the specifics of it, but I remember Vivillon being Sashed and going for Sleep Powder on Garchomop, which I immediately recover from, and then later he's able to Sleep Powder Clawitzer and disable it for the match, asnd he has another Scarf Mamoswine, which I'm able to KO with a burn plus additional damage.
5-1
Round 7: Ashton Cox (LinkYoshiMario)
Me: Mienshao/Clawitzer/Aromatisse/Abomasnow
Opponent: 

 (Absol/Garchomp)
This was the guy I heard last match someone across the table talking about how weird it was that there was a Diggersby being used, which I'd only faced a few times before. From team preview, I saw even weirder things like Absol and Weavile, as he lead out with the latter and Charizard, as I decided to go into my slower mode that match. I go for Rock Slide turn 1 and knock Weavile down to his Sash as he goes for Fake Out on Clawitzer, protecting Charizard. He then switches out Charizard for Diggersby, as Weavile goes for Icicile Crash onto Mienshao, which doesn't knock it down to its sash as I KO Weavile. Diggerby next turn goes for a Scarf Wild Charge onto Clawitzer, and I live by about 5 HP, knocking it out with Water Pulse. I switch out Mienshao and bring in Abomasnow as he brings in Charizard, and we both mega evolve, setting up sun, as Charizard protects and I get a Dark Pulse flinch on his Clawitzer. Abomasnow and Clawitzer get knocked out by Heat Wave next turn as I'm able to set up my hail, and it brings me to a vital prediction the next turn: seeing as how he know Mienshao has Rock Slide, I had to predict whether or not he would Protect with Charizard and allow Clawitzer to live a Rock Slide + Moonblast, or don't Protect and have Charizard KO Mienshao, sacrificing Clawitzer but forcing the match to go with Aromatisse versus Charizard, which I couldn't win. I predicted the former, but he unfortunately went for the latter, sealing my fate right there.
5-2
Round 8: Nicholas Brown
Me: Mienshao/Aromatisse/Abomasnow/Clawitzer
Oppnent: 

 (Rotom-W/Cryogonal)
This was the guy that I heard apparently beat Aaron Zheng earlier in the day with Aerodactyl, so I was very interested to see what he would bring. From team preview I saw Nidoking and Cryogonal, which besides making me think immediately of feathers, told me I should probably bring my slower mode again. He lead out with Nidoking and Meowstic as I went with the Mienshao/Aromatisse lead. Mienshao went for Fake Out on the Meowstic as Nidoking went for Sludge Bomb on the Aromatisse, which I was thankfully able to take and set up Trick Room. I switched out Mienshao next turn for Abomasnow, as Meowstic went for Swagger on Aromatisse, but I was thankfully able to break through and went for Light Screen, which saved Aromatisse from a 2HKO. Aromatisse broke out of confusion to go for Moonblast on Meowstic, as Meowstic tried to Swagger Abomasnow, but Abomasnow was able to hit both of them with Blizzard for the double KO. He then brough in Machamp and Aerodactyl, as Abomasnow broke through confusion and KO'd Aerodactyl, as Aromatisse set up Reflect, saving Abomasnow from an OHKO from DynamicPunch. The next turn, I broke through confusion again as Trick Room wore off, going for a +2 Ice Shard to KO the Machamp.
6-2
Round 9: Scott Immel
Me: Garchomp/Rotom-H/Clawitzer/Abomasnow
Opponent: 
 (Meowstic/Mamoswine)
Going into this battle, my opponent was commenting on how his team had a ton of trouble with Rotom-H, and immediately I knew what I was going to lead with. Scrafty surprisingly doesn't go for Fake Out and instead opts for Stone Edge, but not before Venusaur misses Sleep Powder on Rotom as I proceed to burn the Scrafty, and I'm free to spam Earthquake on the team. I knock out Venusaur and Charizard the following turns, as Scrafty actually reveals it isn't Banded like I though, but I'm still able to KO it with more hits plus burn damage, until he's left with just Abomasnow. I bring out Abomasnow to take care of it, ending with a 4-0 victory.
7-2
After this match, I'm extremely tense, double-checking my resistance, making sure I don't bubble out. In what felt like an eternity, the placement rankings finally come out:
I made it into top cut! Coming from so much doubt in the morning, I'm extremely excited to make it this far. However, it's already past like 5 PM, and my mom was thinking we would be heading home at around 4, which definitely didn't happen (but I'm really greatful she understood why I had to stay longer). As the player meeting begins, we're all forced onto the Battle Spot for a very late hack check, but instead of doing rated battles we chose free battles, which I'm still confused as to why. Anyways, as the sun came down, I was paired up with Derek Gazis.
Top Cut, Round 1/3
Me: Mienshao/Rotom-H/Garchomp/Clawitzer
Opponent: :  (Chandelure/Charizard)
I heard from a few other people that his Kangaskhan has Facade, which I had run into a few of those throughout the day. From team preview I see three Fire-types, which I would be absolutely paranoid of running (I'm already scared of running two Fire-types in regualr matches), so I decide to leave out Abomasnow for this match. Turn 1 I'm able to Fake Out the Kangaskhan as Talonflame sets up Tailwind, as I go for Overheat onto Kangaskhan, afriad of burning it. Next turn his Talonflame goes for the Overheat onto Mienshao, which knocks it to its Sash, and then Kangaskhan gets a +1 Power-Up Punch to KO Mienshao, as I'm unable to knock out Talonflame with a -2 Thunderbolt. He then switches out Talonflame for Rotom-W as I bring in Garchomp, but am swiftly OHKO'd by Kangaskhan's Return, but not without getting some Rough Skin damage+damage from Rotom-H to KO the Kangaskhan. Next turn he sends out Talonflame, which gets almost 75% onto Clawitzer, as his Rotom-W misses Hydro Pump on Rotom-H as I am able to KO the Talonflame and get some solid damage onto Rotom-W. As Tailwind runs out, Hydregion and Rotom-W are both able to easily take care of Clawitzer and Rotom-H, ending the match in a 0-2 loss.
Top Cut, Round 2/3
Me: Mienshao/Aromatisse/Rotom-H/Abomasnow
Opponent: Same as before
Seeing as this was my last match of the day, I was actually able to record it:
http://www.youtube.com/watch?v=B49h2gkc2wk
Needless to say, I was massively outplayed. He made so many better match calls than me that I just couldn't keep up.
After that harsh loss, I found out that Stormfront had gotten into the same situation as me, but I was a little bit relieved it was over because it had been an incredibly long day, and I wanted to get home sometime before midnight.
Pros:
- Top cutting regionals for the first time
- Having a lot of excellent games, whether winning nor losing- not a terrible amount of hax for either side
- Meeting all my previous friends and making some new ones, the bond with fellow players is a really big element of what keeps me going
- The bacon cheeseburger from Cracker Barrel was fantastic
- Team Aqua vs. Flare Laser Tag needs to happen again asap
- Sunday was absolutely beautiful outside and I would often take breaks to go outside and get some fresh air, which was massively refreshing
- Pulling a GOLD ZEKROM from the packs I won from top cut
- Tournament staff organized the event incredibly well; not as well as Philly, but for something almost Nats-sized, I give them huge props
- Hotel was really cheap, but wasn't a piece of crap
Cons:
- No saving battle videos- I can understand why this is in place in order to prevent scouting with the Mock Battle feature, but I'm wondering if there's a way to prevent a Mock Battle on a video, because without battle videos we can only really see from notes and word-of-mouth how players played. This is really my biggest problem and the one I want fixed the most
- That stupid stomach pain in the morning, and how I had to run the whole day without eating anything
- Only two places to eat were Burger King and Denny's without having to drive like 10 miles south
- The rain on Saturday, and how it left a massive puddle in the courtyard of the hotel, so you had to walk all the way around just to get to the other side
- Although I understand the idea of posting records, I feel like it could've been handled a little better- rounds took about 50 minutes because of it
- Laser tag required you to have two hands on the gun
- The questionable hack check process
- No changing the battle music- if I could use music 11 I would've been in the zone all day all night
Despite those complaints, I had an incredibly fun time. I'm happy I got 12th seed and 15th place, but I'm most likely going to retire this team early because I already have my mind on some bold new things, which I can't wait to try out in future events.
Article art is done by myself, which you can check out my art blog for more.